
Mirid bugs don’t announce themselves. They drain the life out of your crops, and by the time you notice the damage, it’s already serious.
Stippled leaves, distorted shoots, unexplained yield loss — these are the signs. Spot any of them, and these tiny piercing insects are likely ahead of you.
Imidacloprid is one of the most reliable tools for turning that around. It works — applied at the right time, with the right product, in the right way. Get those details wrong, and results suffer.
This guide covers every decision point. From confirming the infestation to rotating chemistries, you’ll know exactly what to do — and how to stop resistance from building up before it becomes a bigger problem.

Mirid Bug Control With Imidacloprid: Step-By-Step Guide
Here’s the system that works — broken into clear, actionable steps.
Step 1: Time Your Intervention
Mirid bugs hit a predictable seasonal window: September through December. They peak hard in October and November. In high-pressure regions, counts can reach 65.6 bugs per 25 squares. Start monitoring at day 38 after sowing. Check pest density every two weeks so you’re always ahead of the problem.
Step 2: Choose Your Application Method
Two options. Pick based on your crop stage:
-
Seed treatment: Imidacloprid 70 WS at 7.5g/kg seed — protection built in from germination
-
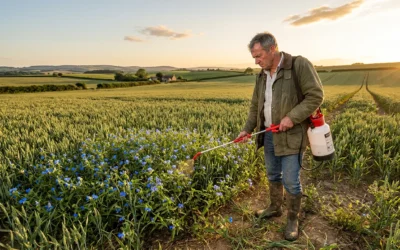
Foliar spray: Imidacloprid 17.8 SL at 0.25 ml/l — four applications, every two weeks, starting day 40
Run both together and the results stack up fast. You get a 93.43% population reduction, sesame yields climb to 770 kg/ha, and the benefit-cost ratio hits 4.22.
Step 3: Know What You’re Protecting
Unprotected crops drop 290 kg/ha — an 11.69% yield gap you can avoid. Treated plots hold at 2,770 kg/ha. Untreated fields sit at 2,480 kg/ha. That gap is real money left on the table.
Step 4: Watch Your Predator Populations
Imidacloprid combinations can cut beneficial spider populations by up to 58%. Build that into your rotation schedule. Spray only what the crop actually needs — no more.
Identify Mirid Bug Infestation

Most pest problems are obvious until they aren’t. Mirid bugs are different — they blend into your crop while the damage builds up underneath. You won’t notice until it’s too late.
Get identification right first. Misidentify the pest, and every treatment decision after that is built on sand.
What Mirid Bugs Look Like
The family isn’t uniform. Three species show up most often in field crops. Each looks different enough to create real confusion.
Green mirids are the easiest to spot — 7–9mm long, with an elongated body, long antennae, and transparent wings folded flat across the back. You’ll know one when you see it up close.
Brown mirids are the problem species. Their color matches surrounding foliage almost dead-on. The giveaway is the antennae: alternating red-brown and white bands. Growers often mistake them for damsel bugs, which are beneficial insects. That’s a costly mix-up — one worth avoiding.
Crop mirids run smaller — 4 to 7mm — with a grey-green or mottled brown back, a bright green underside, and a dark ‘V’ pattern on the back. The wing tips bend downward at a sharp angle. That shape leads to another common mistake: people call them broken back bugs instead.
Nymphs are easier to confirm. Crop mirid nymphs carry a distinctive black spot on the back. See that spot, and you have your answer.
Across all species, look for these shared features:
– A crease across the wing forming a triangle (the cuneus) at the tip
– 4-segmented antennae, long and thin
– No ocelli (no simple eyes)
– Soft body, often with a humpbacked prothorax and head angled downward
Size runs 2–15mm. Most field specimens stay under 12mm.
How to Scout
Sweep nets work well for open-canopy crops. Beating trays give more reliable results for plant-dwelling species. Sticky traps catch flying adults but miss nymphs completely — treat them as an early signal, not a full population count.
For cotton and sesame, start scouting at 38–40 days after sowing. Count mirids per 25 squares or per plant on a set schedule. Before any imidacloprid application, check that the population spreads across the whole field — spot-treating a patchy infestation wastes product and pushes resistance faster.
The lifecycle runs 3–4 weeks, shorter in heat, longer in cooler conditions. Stick to regular counts. A two-week gap between checks can mean two full generations missed.
Select Imidacloprid Product
Two formulations dominate the market for mirid bug control. Each has a specific role. Pick the wrong one for your situation, and you’re leaving performance on the table.
Imidacloprid 75 WSP Select™
This is the water-soluble powder option. It comes in pre-measured packets — 4 packets at 1.6 oz each — which removes the guesswork from mixing. The active ingredient sits at 72.75–77.25% imidacloprid. Amorphous silicon dioxide and calcium carbonate act as carriers.
The toxicity profile is low-risk. Acute oral LD50 in rats exceeds 2,591 mg/kg. Dermal LD50 in rabbits clears 2,000 mg/kg. The main handling concern is mild eye irritation — wear goggles and you’re covered.
Imidacloprid 2F Select
This is the liquid formulation. It’s easier to measure in the field. You get a flexible rate range too: 13.0–20.0 fl oz/acre, with a hard cap of 20.0 fl oz per year (0.31 lb AI/acre).
Why Soil Behavior Matters
Imidacloprid stays in soil for a long time and moves at a moderate rate — leachability index of 3.69. Water solubility reaches 610 mg/L at 20°C. So it travels through the soil profile and keeps working after you apply it. In sandy or irrigated ground, keep a close eye on usage. The residual activity works in your favor — up to the point it becomes a groundwater concern.
Determine Application Timing
Timing decides whether your imidacloprid works or fails — not the formulation, not the rate, not the equipment. Miss the window and the chemistry won’t help.
Mirid bug pressure runs on a predictable seasonal cycle. The active period spans September through December. Populations peak hard in October and November. These aren’t rough estimates — in high-pressure regions, counts hit 65.6 bugs per 25 squares at peak. That number shows how fast things can get out of hand.
Start Monitoring Early
Don’t wait for visible damage before you start scouting. Get out at day 38 after sowing — before populations gain any momentum. From there, run counts on a two-week interval, without gaps.
That two-week gap matters more than most growers think. The mirid lifecycle turns over in 3–4 weeks under normal field temperatures. Miss one scouting round and two full generations can cycle through before your next count. At that point, you’re chasing the problem, not managing it.
Decide When to Spray Imidacloprid
The spray decision isn’t about the calendar date. It comes down to population thresholds confirmed across the whole field.
-
Spot infestations → targeted action only
-
Widespread pressure → full field application
For foliar imidacloprid, start the first spray at day 40 after sowing. Then space each follow-up every two weeks for four total rounds. This schedule lines up with the pest’s reproductive cycle. You hit each new generation before it peaks.
One checkpoint before you spray: make sure the infestation spreads across the field, not just in patches. Spraying a patchy population wastes product, speeds up resistance, and leaves untreated pockets that will repopulate the field.
Prepare Spray Solution

Getting the math right here isn’t optional. An under-dosed tank wastes your time and product. An over-dosed one damages crops, accelerates resistance, and creates regulatory problems you don’t want.
Work through the calculation before you touch the sprayer.
Calculate Your Coverage Area First
Start with area, not product volume. Measure the square footage your sprayer will actually cover in a single pass. Then convert that to a percentage of an acre using this formula:
% acre = area (sq ft) ÷ 43,560
Say 1 gallon covers 1,075 sq ft — that’s 1,075 ÷ 43,560 = 0.0247 acres. Multiply that figure by your per-acre rate of imidacloprid, and you have the exact product volume needed for that tank load.
For liquid imidacloprid formulations, measure in fluid ounces:
Product (fl oz) = (target % × spray solution fl oz) ÷ 100
Mixing Order
Add water to the tank first — about halfway. Add imidacloprid product next with agitation running. Top up to final volume. Never pre-mix concentrate in a separate container and dump it in cold. Solubility matters: imidacloprid reaches 610 mg/L at 20°C, so water temperature affects how cleanly it dissolves. Keep your mixing water close to that range.
Apply Imidacloprid Spray

Tank is mixed. Now execution matters.
Getting the spray application right isn’t as simple as it looks. A wrong nozzle, bad timing, or poor coverage angle — and the imidacloprid never reaches the target. Mirid bugs hide on leaf undersides and stem junctions. Miss those zones and you’ve wasted product on air.
Match Your Water Volume to the Rate
Don’t eyeball this. Use the table below for the exact product volume by tank size:
|
Water Volume |
Imidacloprid 2F Product |
|---|---|
|
100 gallons |
1.7 fl oz (3 tbsp + 1 tsp) |
|
50 gallons |
0.85 fl oz (1 tbsp + 2 tsp) |
|
25 gallons |
0.425 fl oz (2.5 tsp) |
|
10 gallons |
0.17 fl oz (1 tsp) |
|
5 gallons |
0.085 fl oz (0.5 tsp) |
Each gallon of finished solution gives you 0.12 grams of active ingredient. That number keeps your total AI load consistent across different tank sizes.
Get Coverage Right
This is where most applications fall short. Imidacloprid needs direct contact with the pest’s feeding surface — not just the top of the canopy.
-
Spray stems, branch undersides, and topsides — all of them, not just a pass over the top
-
Leaf undersides are non-negotiable. Mirids feed there. Spray that doesn’t reach them does nothing
-
Use enough water to reach run-off — then stop. Too much run-off wastes product and adds extra chemical load to the soil
-
For waxy or hard-to-wet foliage — holly, pine, dense canopy crops — add a spreader/sticker to the tank
Nozzle and Equipment Setup
Ground application minimum: 100 L/ha. Use hollow cone nozzles with a droplet VMD of 150–180 microns. Flat fan nozzles can work. They need higher water volumes and careful nozzle setup to get the same underside coverage, though.
Aerial application runs leaner: 25 L/ha minimum, VMD drops to 120–150 microns. Keep swath width at or below 20–22 meters. Go wider than that and coverage thins out at the edges.
Time the Spray Window
Spray in the early morning or evening. Midday sun scorches wet foliage and harms beneficial insects still active in the field. Stick to calm days — wind drift wastes product and puts chemical where you don’t want it.
Pest pressure is high on your first spray? A second application may be needed. Don’t skip it. High starting populations recover fast. The two-week lifecycle means a partial knockdown can build back into a full infestation in just one generation.
After each application: mark treated plants, then set your next monitoring check. Watch for reinfestation at the two-week interval already built into your spray schedule.
Keep people and animals out of treated areas until the spray has dried completely.
Monitor Post-Treatment Efficacy
The spray went down. Now the real work starts.
Check what happens after application. That tells you whether the imidacloprid did its job — or whether you’re heading into a resistance problem you don’t see yet.
Track Population Counts Every Two Weeks
Keep scouting on the same two-week schedule you ran before treatment. The numbers should move. A successful imidacloprid program drives mirid density down to around 13.60 bugs per 25 squares from consistently high field counts. Not hitting that kind of reduction? Something went wrong — coverage, timing, resistance, or all three.
Keep an untreated control strip in your field if possible. It gives you a clean comparison point. Treated plots should show a clear population drop. Your untreated strip should stay at high counts. That contrast gives you solid proof the program is working. No benchmark means you’re reading the data blind.
Read the Numbers Straight
Don’t just confirm the treatment worked — measure how well it worked.
Compare pre-application counts against your two-week post-treatment records. Look for a steady downward trend across the field. A single low reading after the first spray isn’t enough. One good count followed by a spike two weeks later means reinfestation. That’s not control.
Populations still not dropping by your second monitoring check? Adjust now. Don’t wait. The longer you hold off, the more the infestation resets — and you lose your window entirely.
Rotate Insecticides to Prevent Resistance
Resistance isn’t a future problem. In the United States alone, it already adds $40 million to annual insecticide costs. That number climbs every season growers skip a rotation plan.
Imidacloprid works well. Use it alone, generation after generation, and you’re selecting for the exact bugs that survive it. That’s how you breed a resistant population.
Three strategies exist for managing resistance. Picking the right one for your situation is what separates a program that holds up for years from one that fails in a single season.
Know Which Strategy to Use
Rotation — switching between insecticide classes across pest generations — works best under these conditions:- Cross-resistance between your chosen products is zero or negative (resistance to one product raises susceptibility to the other)- You’re using systemic insecticides with premating adult dispersal- Refuge proportions are small
There’s one hard limit. Rotation loses its edge as insect reproduction rates rise. High-reproduction populations build resistance faster than any rotation schedule can keep up with.
Mixtures — combining two insecticides at full dose — outperform rotation in most tested scenarios. They extend strategy lifespan the longest, no matter the starting resistance levels or cross-resistance profile. The catch is coverage. Mixtures need high insecticide efficacy and full field coverage to deliver results. Cut corners on either, and the advantage disappears.
Sequential use — applying one chemistry until resistance builds, then switching — is the weakest option across the board. It never beats rotation or mixtures. Don’t base your program on it.
The Parameters That Predict Outcomes
Not all variables carry the same weight. Research points to these factors as the strongest predictors:
-
Intervention coverage — keep it at ≥0.5 for real protection
-
Cross-resistance level between imidacloprid and your rotation partner
-
Heritability of resistance traits in your local population
-
Fitness costs carried by resistant alleles
-
Deployment interval — 10-generation vs. 30-generation gaps produce very different results
-
Refuge proportion left untreated in each application cycle
Track these numbers. They’re not just theory — they’re the levers that control how long your chemistry stays effective.
Safety and Integrated Approach
Imidacloprid gets the job done. A chemistry that works this well comes with real responsibilities.
The strongest programs don’t just focus on pest knockdown. They treat safety as its own system — one that runs alongside every application decision, not after it.
Build Safety Into the Schedule
Act on early warning signs. Don’t wait for a problem to show up first.
Injuries and drift incidents are late-stage signals. They confirm something already went wrong. Near-miss tracking catches the pattern early — before it turns into a real event.
Make It Systemic
One safe application doesn’t make a safe program. Consistency does.
-
Rotate chemistries on schedule — not just for resistance, but to cut the buildup of imidacloprid in the soil over time
-
Keep untreated refuge strips in place to help predator populations recover
-
Log every application: rate, coverage, wind speed, PPE worn
More people involved in monitoring and reporting means fewer things get missed. Worker participation shapes your outcomes — so make it part of the routine, not an afterthought.

Mirid bugs don’t wait, and neither should you. The right imidacloprid product, precise timing, and a steady monitoring routine — that’s all you need to stop an infestation before it tears through your crop.Skip any one of those steps, and next season gets a lot harder.
So here’s your next move — walk your field today. Look for feeding damage. Check your product labels. Schedule your first application window. Keep a simple log of what you spray and when.
Good pest control isn’t about one perfect treatment. It’s about building a smarter system, season after season. Start that system now.



0 Comments