
Cherry trees are beautiful — until aphids, borers, or scale insects show up and change everything. Watching a promising harvest fall apart despite your best efforts is frustrating. Pests can wipe out an entire season’s work in no time. Imidacloprid is a proven, systematic solution — but it only works when you use it right.
Effective protection comes down to three things: product selection, application timing, and a few critical restrictions most growers miss. This guide covers every practical step. You’ll learn how to pick the right formulation, nail your application timing, and respect pre-harvest intervals — so your cherry trees get the protection they need, with no guesswork involved.

Select the Appropriate Imidacloprid Product
Not all imidacloprid products are equal. The label determines everything.
Most growers make their first mistake here: they grab any imidacloprid product off the shelf and assume it’ll work. It won’t. The EPA requires each product to be registered for specific crops. Using an unapproved product isn’t just ineffective — it’s illegal.
Know Which Products Are Approved for Cherries
Two products carry labels for cherry trees: Admire Pro and Alias. Both list tree fruits, including cherries, on their labels. No cherries on the label? Don’t use it on your trees. Simple as that.
One product to stay away from: Imidacloprid 4F (EPA #66222-156). It’s registered for cotton only. That’s it. Using it on cherry trees puts you in direct violation of federal pesticide law.
Match the Formulation to Your Application Method
Label approval confirmed? Now pick your formulation based on how and where you need it to work:
-
Granular (e.g., Quali-Pro Imidacloprid .5G at $56.05): Goes into the soil. Roots absorb it slowly over time. Best for persistent, soil-dwelling pest pressure.
-
liquid concentrates (e.g., Prime Source Imidacloprid 2F at $36.29, Quali-Pro 2F T&O at $78.53): Applied to foliage. Acts fast on contact. Better for quick results against aphids or leafhoppers.
The rule is simple: soil pest problem = granular; foliar pest problem = liquid concentrate.
Determine Application Timing
Spray too early and you’ve wasted product. Spray too late and the damage is done — sealed inside the fruit, invisible, irreversible. With imidacloprid and cherry fruit fly management, timing isn’t just important. It’s everything.
Understand the Pest’s Window
Cherry fruit fly adults start emerging from the soil in late May to early June across Utah and the Western US. In Western Washington, emergence starts around mid-May — about five weeks before harvest. Adults don’t disappear fast once they show up. Emergence runs through summer into fall, covering three or more months of active pressure.
Here’s what most growers miss: freshly emerged females aren’t dangerous right away. They need 5–7 days post-emergence before they’re mature and ready to lay eggs.
Wait for the Right Fruit Color
Adult flies can’t get through immature cherry skin. Spraying before fruit reaches salmon-blush color does nothing. That color change is your biological trigger. Once fruit hits that stage — and until it softens or drops — it’s vulnerable. Peak infestation runs mid-June through mid-July. That’s your critical control window.
Apply Before Eggs Are Laid — Not After
Once a female drops eggs under the fruit skin, sprays do nothing. Eggs hatch within 5–8 days. Larvae feed inside the fruit for 14–21 days before exiting — with no visible signs on the outside. By the time you spot a problem, it’s too late to act.
The rule is firm: apply during or just before the egg-laying period. Hit adults before mating starts. Schedule sprays for early morning or late evening on wet fruit to get the best results.
One hard boundary — never spray during bloom. Cherry fruit fly adults don’t show up until after petal fall, so correct timing keeps pollinators out of harm’s way.
Identify Target Pests

Knowing which pest you’re dealing with changes everything about how you respond.
Imidacloprid is a systemic insecticide. It moves through the tree’s vascular tissue and attacks the nervous systems of feeding insects. That mechanism works well against specific pest types. Use it on the wrong target, and you’ve wasted money protecting against nothing.
The Pests Imidacloprid Controls on Cherries
Three main threats drive most imidacloprid applications on cherry trees:
-
Aphids: Feed on new growth and excrete honeydew that invites sooty mold. Populations explode fast — a small colony turns into a serious infestation within days.
-
Scale insects: Attach to bark and stems and drain nutrients without any visible warning. By the time you spot the damage, the colony is already established.
-
Leafhoppers: Puncture leaf tissue and spread plant diseases. They’re hard to catch early because adults scatter fast when disturbed.
All three insects feed on plant tissue. That’s the route imidacloprid takes to reach them.
How to Scout Before You Spray
Don’t spray based on calendar dates alone. Scout first.
Walk your rows with purpose. Flip leaves. Check stem junctions. Look at new growth up close. This isn’t casual — it’s targeted. USDA protocols pair hands-on field exams with digital imaging for precise identification. Sticky traps and pheromone lures add another layer. They flag pest activity before populations grow out of control.
One practical rule: No confirmed pest presence means no confirmed spray timing. Identification comes before application — every time.
Prepare for Soil Drench Application
Soil drench works — but the groundwork has to be done right. Skip the prep steps, and the imidacloprid never reaches the root zone.
Calculate Your DBH and Dosage First
Before mixing anything, measure your tree’s diameter at breast height (DBH). Wrap a tape measure around the trunk at 4.5 feet above ground. Divide the circumference by 3.14. That number drives your rate calculation.
Multiple stems? Measure each one apart if they divide above ground. Do they split below the DBH measurement point? Measure at the narrowest point between the root flare and the split.
Rate limits matter here. Stay at the lowest label rate — never exceed 0.4 lb active ingredient per acre per year. For trees over 40 inches DBH, add 3 oz per additional inch.
Prepare the Soil and Trench
Clear the area first. Pull back mulch, leaves, and any debris within 1–2 feet of the base — but stop at the dripline. Remove any plastic sheeting that blocks root zone access.
Dig a trench 2–3 inches deep and 4 inches wide around the base. Got compacted soil, heavy clay, or runoff-prone ground? Go deeper. Then pre-moisten the soil — moist, not saturated — before putting anything down.
Pour at low pressure, spreading the mix into the trench in an even pass. Use a minimum of 10 gallons per 1,000 sq ft. On slopes, focus on the uphill side. Wait one hour. Then follow up with an equal volume of plain water to push the solution deeper into the root zone.
Post-Application Care
Keep the treated area moist for 7–10 days. Put soil and mulch back after the solution has absorbed — not before.
One firm rule: never apply to waterlogged soil. Also skip the application if heavy rain is in the forecast within 24 hours.
Prepare for Spray Application
A sprayer that hasn’t been checked is a liability. Before imidacloprid goes anywhere near your cherry trees, the equipment needs to be ready — fully inspected, calibrated, and confirmed.
Run Your Equipment Checks First
Start at the basics. Reconnect the battery. Check tire pressure. Pull out the operator’s manual and review the product parameters specific to your setup.
Then work through the mechanical inspection:
-
Hoses and fittings: Look for leaks, pinholes, or soft spots — even a small leak throws off your delivery rate
-
Nozzles: Replace worn ones immediately. A worn nozzle over-sprays. A clogged one under-covers. Neither gives you reliable pest control.
-
Pressure gauge: Verify accuracy before you trust the reading
-
Travel speed: Measure it. Don’t estimate it.
Calibrate Before You Mix Anything
Calibration isn’t optional — it’s what separates effective application from wasted product.
Adjust until your delivery rate matches the label recommendation. Then calculate pesticide quantity for the full tank based on that confirmed spray volume.
Smaller plots: Fill a known volume — say, 1 gallon — spray over a measured area. If 1 gallon covers 1,075 sq ft, that’s 0.0247 of an acre. Scaling to 2,000 sq ft means you need 1.86 gallons. Your pesticide-per-gallon rate follows from there.
Mix Only What You’ll Use
Mix to your planned coverage — nothing extra. Leftover mixed solution creates a disposal problem. Use an electronic scale for dry formulations. If the label specifies application to runoff or wet leaves, no further calibration math is needed — the label rate drives everything.
Know Your PHI Before the First Drop Falls
Two hard numbers to keep straight:
-
Soil-applied imidacloprid: 21-day pre-harvest interval
-
Foliar-applied imidacloprid: 7-day pre-harvest interval
Miss these windows, and your harvest has a residue problem — not a pest problem.
Final Spray Tips
Target the inner canopy and undersides of leaves using coarse nozzles. Cherry foliage can be waxy and hard to wet — add a spreader-sticker to improve adhesion and coverage where it matters most.
Log everything: application rates, weather conditions, equipment calibration results, and travel speed. Records aren’t paperwork — they’re protection.
Apply the Product

Everything up to this point — the product selection, timing windows, scouting, and equipment calibration — was preparation. This is where it either works or it doesn’t.
Soil Drench: Pour Slow, Push Deep
Position your hose or applicator at the trench edge. Pour at low, steady pressure — not a fast dump. You want the solution to saturate downward, not pool at the surface.
Work around the full perimeter of the trench in one continuous pass. Even coverage matters here. Thin spots in your application create gaps in root uptake, and those gaps become entry points for pests you thought you’d handled.
Once the solution is down, wait one full hour. Then follow with an equal volume of clean water. This second pour is what drives imidacloprid past the surface soil and into the active root zone. Skip it, and much of your product stays too shallow to work.
Foliar Spray: Reach the Hidden Surfaces
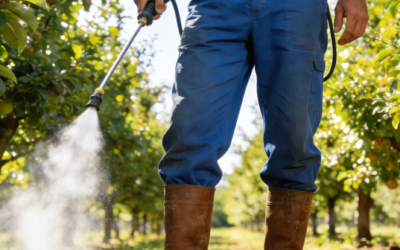
Direct spray toward the inner canopy and the undersides of leaves. That’s where aphids, scale, and leafhoppers actually feed — not the tops of leaves, which look like the obvious target.
Cherry foliage is naturally waxy. Without a spreader-sticker additive, much of your spray beads off before it penetrates. Add it to every foliar mix.
Use coarse nozzles to reduce drift. Fine mist sounds thorough — it’s not. It evaporates before reaching where it needs to go.
One Final Check Before You Walk Away
Confirm your pre-harvest intervals one last time:
-
Soil drench: 21 days before harvest
-
Foliar spray: 7 days before harvest
These aren’t suggestions. They’re the boundary between a compliant harvest and a residue violation. Know your pick date. Count back. Apply accordingly.
Follow Frequency and Rate Restrictions

More imidacloprid does not mean better protection. It means resistance buildup, residue violations, and a tree under more chemical stress than pest pressure.
The label sets hard limits — and those limits exist for good reason.
Stay Within Annual Application Limits
For cherry trees, imidacloprid tops out at one soil drench per season. That one application — timed right and delivered to the root zone — carries the tree through its full pest pressure window. Adding a second drench does not extend protection. It pushes active ingredient levels past what roots can handle and what regulators permit.
Foliar applications have their own interval rules. Do not retreat within 7 days of a previous foliar spray. Back-to-back sprays spike residue levels without adding meaningful control.
Respect the Rate Ceiling
The annual rate ceiling is 0.4 lb active ingredient per acre per year — across all application methods combined. That is not a per-application limit. It is the full-season total.
Run the math before every application. A soil drench can eat up most of that allowance fast. Your remaining foliar budget shrinks quickly after that. Go over the ceiling and you have a compliance problem — not a pest solution.
Track every application. Log the date, method, rate, and product. Your records keep you inside the legal boundary. They also protect you if questions come up at harvest.
Observe Pre-Harvest Interval (PHI) and Reentry Interval (REI)
Two numbers on the imidacloprid label carry more legal weight than anything else in the application process — the PHI and the REI. Miss either one, and you’re no longer dealing with a pest problem. You’re dealing with a compliance problem.
PHI is the minimum number of days between your last application and harvest. It protects food safety — it keeps pesticide residues below the Maximum Residue Limits set by the EPA.
Know your harvest date. Count backward. Plan your application around those numbers.
REI works differently. It sets how long people must wait before re-entering a treated area — for any hands-on work: scouting, thinning, weeding, mowing, or harvesting. The wait time depends on toxicity, application rate, crop density, and the type of work involved. Close-contact tasks like hand-thinning require a longer REI than low-contact work like irrigation.
Use multiple pesticides together? Follow the longest REI among all the products you applied.
Communicate and Document
REI compliance doesn’t run on memory alone. Post clear signage in every treated block. Use colored flags — red for areas just sprayed, green once the REI has expired. Take the flags down after the full interval has passed.
Log every application: product, method, rate, date, PHI, and REI. That record is your proof of compliance — and your protection come harvest time.
Monitor Residual Protection and Effectiveness
Applying imidacloprid is step one. But knowing whether it’s still working weeks later — that’s what separates growers who stay ahead of pests from those who find failures at harvest.
Track Control Effectiveness Over Time
One application won’t hold forever. After treatment, go back to the same scouting routine you ran before: flip leaves, check stem junctions, inspect new growth. Aphid colonies rebuilding? Scale activity coming back? Your residual protection is breaking down faster than it should.
Watch for Resistance Signals
Pest populations bouncing back within 7–10 days of a foliar application — that’s a warning sign, not a timing problem. Switch to a different mode of action now. Don’t wait for resistance to spread across your block.
Check Regional and Environmental Restrictions
Imidacloprid works in different ways based on where you grow. Ignoring regional rules doesn’t just cause compliance headaches — it can shut down your entire operation.
Know What’s Off-Limits in Your Area
Some restrictions are absolute. Never apply imidacloprid as a soil injection on Long Island. This isn’t a suggestion buried in fine print. It’s a hard prohibition tied to groundwater vulnerability in that region. Shallow water tables and poor soil conditions there make it a direct contamination risk.
Stay Inside the Annual Rate Ceiling
The 0.4 lb active ingredient per acre per year limit isn’t just a label number. It’s the legal ceiling across all application methods combined — soil drench, foliar spray, everything. Regional regulatory bodies, including EPA NPDES authorities and Army Corps district engineers, track cumulative chemical loading at watershed and county levels. Exceeding that threshold — even by accident — can trigger individual permit requirements or usage suspension.
Check your state’s current imidacloprid registration status before each season. Labels change. Regional conditions shift. What got approved last year may carry new restrictions this one.

Protecting your cherry trees from destructive pests doesn’t have to feel overwhelming. Pick the right imidacloprid product. Apply it at the correct timing. Respect the critical intervals — PHI, REI, and regional restrictions. Do all three, and you’re not just treating a problem. You’re building a reliable defense system around trees you’ve spent years nurturing.
The details matter here. Soil drench or spray, dosage rates, target pest identification — each step counts. Skip any one of them, and it undermines everything else you do right.
Now it’s time to act. Walk your orchard today. Identify what you’re dealing with. Pull up your local extension guidelines. Then apply imidacloprid with the precision this guide has given you. Your cherry trees deserve that level of care — and now you have the roadmap to deliver it.
One right application, done right, can mean the difference between a thriving harvest and a season lost.


0 Comments